You can’t run a vCenter or NSX environment without forward and reverse name resolution. Save yourself time, and get this working before deploying vCenter and NSX Manager. This article looks at simple approach to providing DNS services within an NSX home lab.
Objective:
The goal is to deploy a lab based DNS server that can perform forward and reverse lookup for the following infrastructure entries:
| Device | Fully Qualified Name | IP Address |
| ESXi Host | esxi1.lab.local | 192.168.1.100/24 |
| vCenter | vc1.lab.local | 192.168.1.101/24 |
| NSX Manager | nsxmgr1.lab.local | 192.168.1.102/24 |
| NSX Edge | edge1.lab.local | 192.168.1.103/24 |
| DNS/NTP Server | photon1.lab.local | 192.168.1.104/24 |
| vyos router | gateway1.lab.local | 192.168.1.200/24 |
| External Layer 3 Switch | sw1.lab.local | 192.168.1.201/24 |
Solution:
I’ve chosen to use VMware’s Photon OS as the DNS server operating system. Photon OS is a Linux based, open source, security-hardened, enterprise grade appliance operating system that is purpose built for Cloud and Edge applications. This will give me an opportunity to become more familiar with it.
I’ve chosen to use Unbound as the a free and open-source DNS server. Bind would also be suitable.
Here is an article I found helpful: in getting me started: Installing a DNS Server on Photon OS
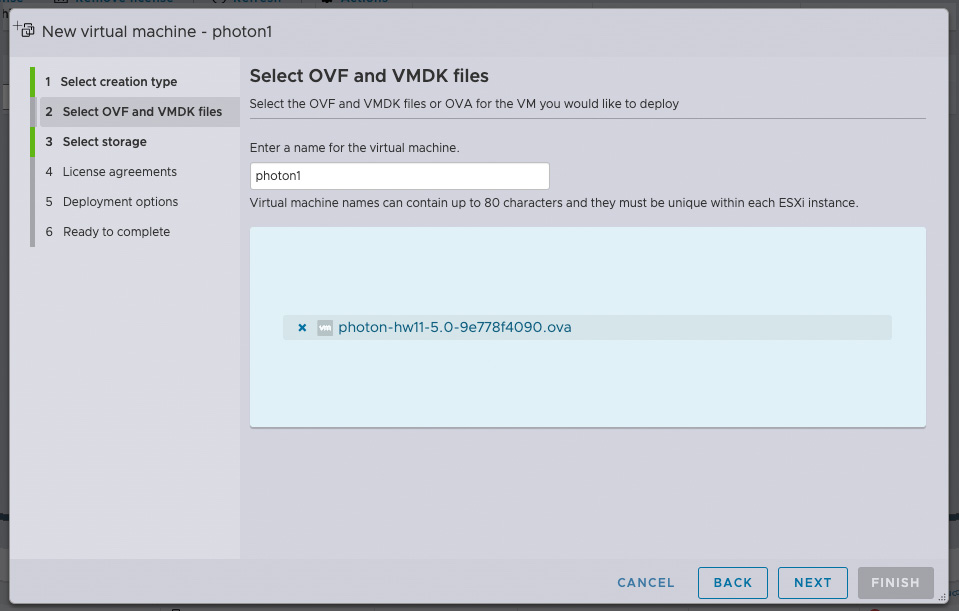
Install Photon OS from an ova:
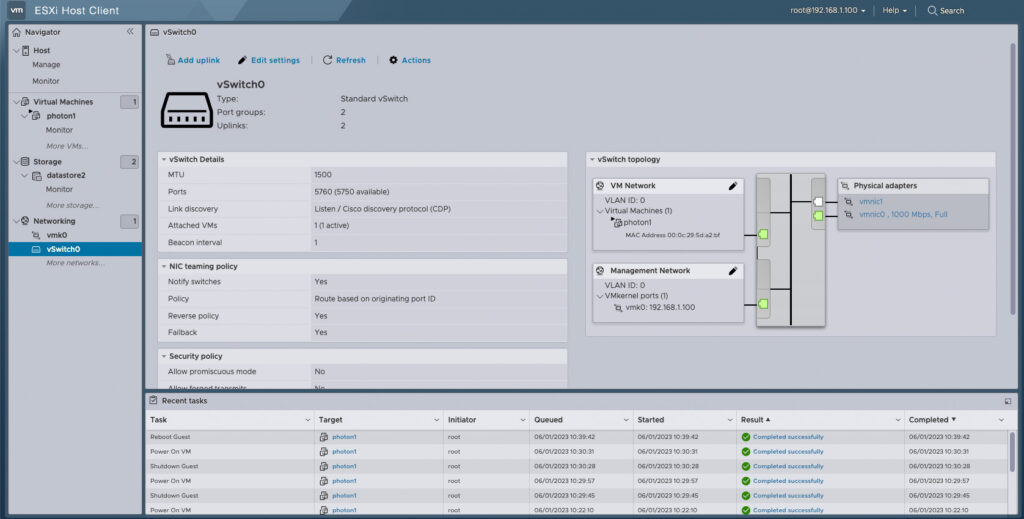
From the ESXi 8.0.0 host, install Photon OS from an OVA, from the Actions pull-down menu, choose Create/Register VM.
I used the latest version, at thus time: photon-hw11-5.0-9e778f4090.ova.
Follow these installation instructions.
Set Photon OS VM with a static IP address:
Follow these steps to set a static IP address of 192.168.1.104/24 on the Photon OS VM.
hostnamectl set-hostname photon1.lab.local

cat > /etc/systemd/network/10-static-en.network << "EOF"

[Match]
Name=eth0

[Network]
Address=192.168.1.104/24
Gateway=192.168.1.1
EOF

chmod 644 /etc/systemd/network/10-static-en.network

systemctl restart systemd-networkd
Install Packages:
Install the Unbound DNS server, and a collection of utilities for querying DNS.
# tdnf install unbound
# tdnf install bindutils
Provision the Photon OS Firewall for DNS
Provision Photon OS to accept ICMP and DNS queries on UDP port 53.
iptables -A INPUT -p icmp -j ACCEPT
iptables -A INPUT -i eth0 -p udp --dport 53 -j ACCEPT
iptables-save >/etc/systemd/scripts/ip4save
iptables -L
Disable systemd-resolver:
systemd-resolved is a system service that provides network name resolution to local applications, and uses UDP port 53. This needs to be freed up for use by Unbound, the local DNS server to be installed.
systemctl disable systemd-resolved
systemctl stop systemd-resolved
rm /etc/resolv.conf
Setup Unbound:
vi /etc/unbound/unbound.conf

server:
    interface: 0.0.0.0
    port: 53
    do-ip4: yes
    do-udp: yes
    access-control: 0.0.0.0/0 allow
    verbosity: 1

local-zone: "lab.local." static

local-data: "esxi1.lab.local A 192.168.1.100"
local-data-ptr: "192.168.1.100 esxi1.lab.local"

local-data: "vc1.lab.local A 192.168.1.101"
local-data-ptr: "192.168.1.101 vc1.lab.local"

local-data: "nsxmgr1.lab.local A 192.168.1.102"
local-data-ptr: "192.168.1.102 nsxmgr1.lab.local"

local-data: "photon1.lab.local A 192.168.1.104"
local-data-ptr: "192.168.1.104 photon1.lab.local"

forward-zone:
   name: "."
   forward-addr: 8.8.4.4
   forward-addr: 8.8.8.8
Start Unbound:
Start unbound, enable it to start at system reboot, and confirm it is running and listening on UDP port 53.
systemctl start unbound
systemctl enable unbound

netstat -tulpn | grep :53
tcp        0      0 0.0.0.0:53              0.0.0.0:*               LISTEN      761/unbound
udp        0      0 0.0.0.0:53              0.0.0.0:*                           761/unbound
Test Unbound:
Use dig, a command-line DNS diagnostic tool from BIND. It retrieves and displays various DNS properties of a hostname or IP address, such as its DNS records and authoritative name servers.
dig esxi1.lab.local

;; ANSWER SECTION:
esxi1.lab.local.	3600	IN	A	192.168.1.100

;; Query time: 0 msec
;; SERVER: 127.0.0.1#53(127.0.0.1) (UDP)
;; MSG SIZE  rcvd: 60
Test IP connectivity:
Use ping to test IP connectivity and name resolution.
ping esxi1.lab.local

PING esxi1.lab.local (192.168.1.100) 56(84) bytes of data.
64 bytes from esxi1.lab.local (192.168.1.100): icmp_seq=1 ttl=64 time=0.217 ms
64 bytes from esxi1.lab.local (192.168.1.100): icmp_seq=2 ttl=64 time=0.296 ms
64 bytes from esxi1.lab.local (192.168.1.100): icmp_seq=3 ttl=64 time=0.294 ms
Configure ESXi for DNS:
Point ESXi host to photon1, 192.168.1.104, the DNS server.
esxcli network ip  dns server add -s 192.168.1.104
esxcli network ip dns search add -d lab.local
Test ESXi DNS:
Test ESXi name resolution for lab and external domains.
ping www.vmware.com
ping photon1.lab.local
pig photon1
Enable VMware Tools on DNS VM:
VMware Tools is a set of utilities and drivers that improve the performance and management of your Virtual Machines running on ESXi, so let’s install it on the Photon OS guest VM.
tdnf -y install open-vm-tools
systemctl enable vmtoolsd.service
systemctl start vmtoolsd.service
Conclusion:
At this point in the lab build-out we have unbound running, as a functional lab DNS server.